Showing posts with label kitchen. Show all posts

Tuesday, September 29, 2015

Island bar


 The island/bar is finally in place in the kitchen. I had nearly a whole sheet of the bamboo plywood left over from the cabinet door project and I put it to good use for the island.

The maple butcher block top is from another project that I was working on. The top was damaged in shipping and they sent me another one and said that I could keep the damaged one. So I flipped it over and used it for the bar top.

I used about six coats of semi-gloss poly on the surface. It came out pretty nice.


I built the shelf out of some of the drop from the bamboo plywood and the toe kick as well. I could add some doors to it eventually but I think I am going to leave it open.
We bought a couple of stools from Ikea which worked out very nicely. It's become our main eating area now.


Maple butcher block
The best thing about it is that it creates a good bit more storage space for large pots and utensils like the food processor. That is a big plus!

We love it.

Sunday, July 26, 2015

Cabinet Doors


Finally, the cabinet doors are finished! I deliberated for a long time on what to make them out of. In the end I went with bamboo plywood from CaliBamboo out of my birthplace, San Diego, California. The sheets weren't cheap, over $200 apiece.

Initially we wanted to not have any pulls on the doors so I beveled the cuts about 17 degrees. It worked okay on the top doors but didn't really work on the bottom cabinets. I ended up using some pulls I bought from Ikea.

All of the hardware is Blum. Each door has the softclose feature which is really nice. I also added one drawer above the trash which is to the left of the stove.

I used Mylands wax polish to finish them with but I have since found out that it isn't going to work well in the kitchen, it's too soft. So I am not sure what I'll end up doing for that. I do like the color and feel the wax gives them.


Raw Cali Bamboo plywood, awesome material! Super heavy and very hard.


Nearly what I envisioned when we bought this house when it looked like it did on the left. It's a nice space now and we really like it.


Tuesday, May 5, 2015

Shoji Door

 I had this shoji door built for me by Cherry Tree Design.

It is for the pantry. It's built from walnut.

Cost $800.

This door was suppose to arrive about a week ago. I had been tracking it and I knew that it was already in town. I called them and they said it was going to arrive at lunch. Never came. Next day, nothing. I called them back. It was coming on a smaller truck. Never showed up. Called them back, it was coming tomorrow. Never came. Called them back. It would be here Monday.


By this time I knew there was a problem and I figured they had damaged it. They did. Cherry Tree didn't start building doors yesterday. Apparently they've had damaged shipments in the past. So they put a sticker on the crate that turns red if the shipment gets jarred.

When the truck showed up I could see the crate but I didn't see the sticker so I knew it was on the opposite side, they were trying to hide it. I walked around on the other side and saw that it was indeed red. I told the driver I had to note it on the ticket. He promptly wrote in "Shock monitor red - no apparent damage". This was suspect.

Backside of OSB crate lid
I looked over the crate which was well made out of OSB. There was a gouge in the top of the box just below the warning sticker. If you look closely you can make it out.
On the left you can see the inside part of the lid where it protruded through about an inch. It didn't puncture the door but I think the paper got stretched because it isn't tight like it should be.

Hole in OSB crate
I realize that loads shift in transit and that it was purely accidental. But they went out of their way to conceal it from me and the vendor, that's the part I can't stand. I lost a lot of time waiting on them to deliver it.

I'll never use Conway to ship anything

Sunday, March 29, 2015

Backsplash

We installed a marble tile mosaic in the kitchen for the backsplash. It was a total of about 27 square feet.
 Each box of tile contained 10 square feet of tile so we boght three boxes. It was $12/box. We laid the tile on the first day and then grouted it on the second day. We added the grout optimizer to the grout too. It is suppose to keep any stains from ever happening on the grout. We used unsanded grout.
We used a diamond cutting wheel on an angle grinder to cut the pieces so a tile saw wasn't necessary. Before grouting we applied sealer to the marble.


It's good to use a razor scraper and a light to make sure all the mastic is off the tile. There is a lot you won't be able to see until you get very close with a light you can hold in your hand.


Before
The simplest thing to do to span the gap between the cabinets where the stove goes is to screw a piece of scrap wood to the wall to rest the tile on. We just used a piece of scrap plywood.

Cost, around $500.


Now that's white!


A while ago the backsplash was white plastic glued to the wall. Perfectly functional but not a whole lot of character.


Monday, March 2, 2015

New Kitchen Cabinets


Top new, bottom old 
I've been busy lately building new cabinets to replace two in the kitchen. The two wall cabinets in the corner are the wrong size.

When I built them I didn't factor in the thickness of the doors. I could slide them over but then the window would not be centered and on the other side of the wall the vent hood wouldn't be centered.

It's not a bad thing though because I put one in my office and the other one is in the laundry room.

I still have the refrigerator cabinet enclosure to build as well. We haven't decided on a door style yet either. Slab door seem the most fitting but they're also the most expensive. It hasn't been bad not having cabinet doors however and I've noticed that lots of people are forgoing them altogether these days. But the base cabinets definitely need doors.


Saturday, December 6, 2014

Cooking With Gas!


Samsung Gas Range
The old electric stove died right in the middle of cooking supper last Saturday night!

I could have probably fixed it but I had already paid for the new gas range the previous Wednesday.

This past week has been nightly cookouts on the deck. Not too bad of a week for it since it's been very mild lately. Nonetheless, building a charcoal fire five nights in a row gets old fast.

Ironically, I believe the house originally had a gas stove.

The new Samsung stove was a little over $700.  I probably had $60 in pipe and fittings to extend the gas into the kitchen.

We love it!


Thursday, November 13, 2014

Kitchen Update

A couple of weeks ago the new undermount kitchen sink arrived.

It's a Rohl Fireclay single compartment sink. It and the mounting brackets were about $700. Fireclay is suppose to be nearly indestructible and resists chipping like enameled cast iron does.
I can attest to the fact that it is much lighter. I was able to set the sink in place alone.

Delivery was free from Allmodern.com.

The old sink was a top mounted sink that came with the house that we had been using for the last two years.

Since the cabinet top was cut out for the old sink, I had to butcher the cabinet to mount the new sink. It doesn't matter though since it will be covered by the countertops.

Counter top installation
Speaking of which, arrived today. A few weeks ago we went to a counter place and ordered some granite countertops, finally. I'm not going to mention the business because I'm not happy with their customer relations. Actually, I didn't even go to the place that I had meant to go to because I read the map wrong (but that's another issue).

Anyway, the installers finally showed up this afternoon as the weather was turning wretchedly cold and windy. In about an hour they had the tops installed and polished. I can't say that I'm over the moon with the install. I've seen some discolorations that I'm not happy about.

They use a very acrid epoxy to join the seams with and it gave me a headache and stunk up the house for a long while.

It is nice to have some counters finally and we are happy about that.

The granite plus installation was about $1200.

The new kitchen faucet is a Grohe Concetto, which is a German mfg. but the product is made in Canada.

The faucet was about $300.

It's very nice quality and has a retractable spray head in the nozzle.

We opted to go with the deepest sink we could find which is 10".

I use a lot of big pots and pans and a two compartment sink is a real hindrance when trying to wash them out.  Hopefully this large sink will meet our needs a little better than the old sink.

Next up...tiling the backsplash. Whoopee!


Wednesday, January 22, 2014

The Last Cabinet

 Routing the final cabinet for the rails.
Glue up and assembly...
 Completed carcase

So it's taken approximately a year to build and install all of the cabinet boxes for the kitchen. I've learned a lot in that time. The last cabinet was head and shoulders better than the first. None of them were bad, it's just that you learn better techniques as you go along. It's been a fun process. I still have to build boxes for the island as well.

They won't really ever be noticed once the doors are installed. But I know that I used really good material and they are solid. They should be around way after I'm gone. I could usually build two out of each sheet of plywood. The 3/4" birch plywood cost about $50 per sheet. I probably used around six sheets. I've got lots of labor in them but probably less than $1000 in material. The doors and the hardware will be expensive so it will maybe cost another $1000 to complete the job. Custom cabinets would have been well over $5K. They ain't perfect but I'm okay with that. They turned out alright.

Last wall cabinet installed!

Now if I only had some doors...


Before...


Next, counter tops, tile, trim, etc. etc...


Sunday, January 12, 2014

Kitchen Update

New wall cabinet added. Floor completed. Blind replacing the curtain.

Sunday, November 17, 2013

Vent Hood

 The vent hood arrived yesterday.

It comes with a plug end on the power cable, so I had to wire in an outlet above ceiling.

They sent a flex duct to connect to the hood but instead I got a 6" rigid piece to exhaust to above ceiling. I will vent through roof as soon as possible

We determined 30" above the stove top was the height we liked.

It took longer to install than I anticipated, about 4 hrs.
 Here is the 6" duct roughed in.
 Installed vent hood.

I believe it is 680 cfm with 3 speeds. There are 2 LED lights and 2 removable stainless steel grease filters.

$265 from Sears.

Just makes the stove look even worse...

Monday, August 5, 2013

Kitchen Update


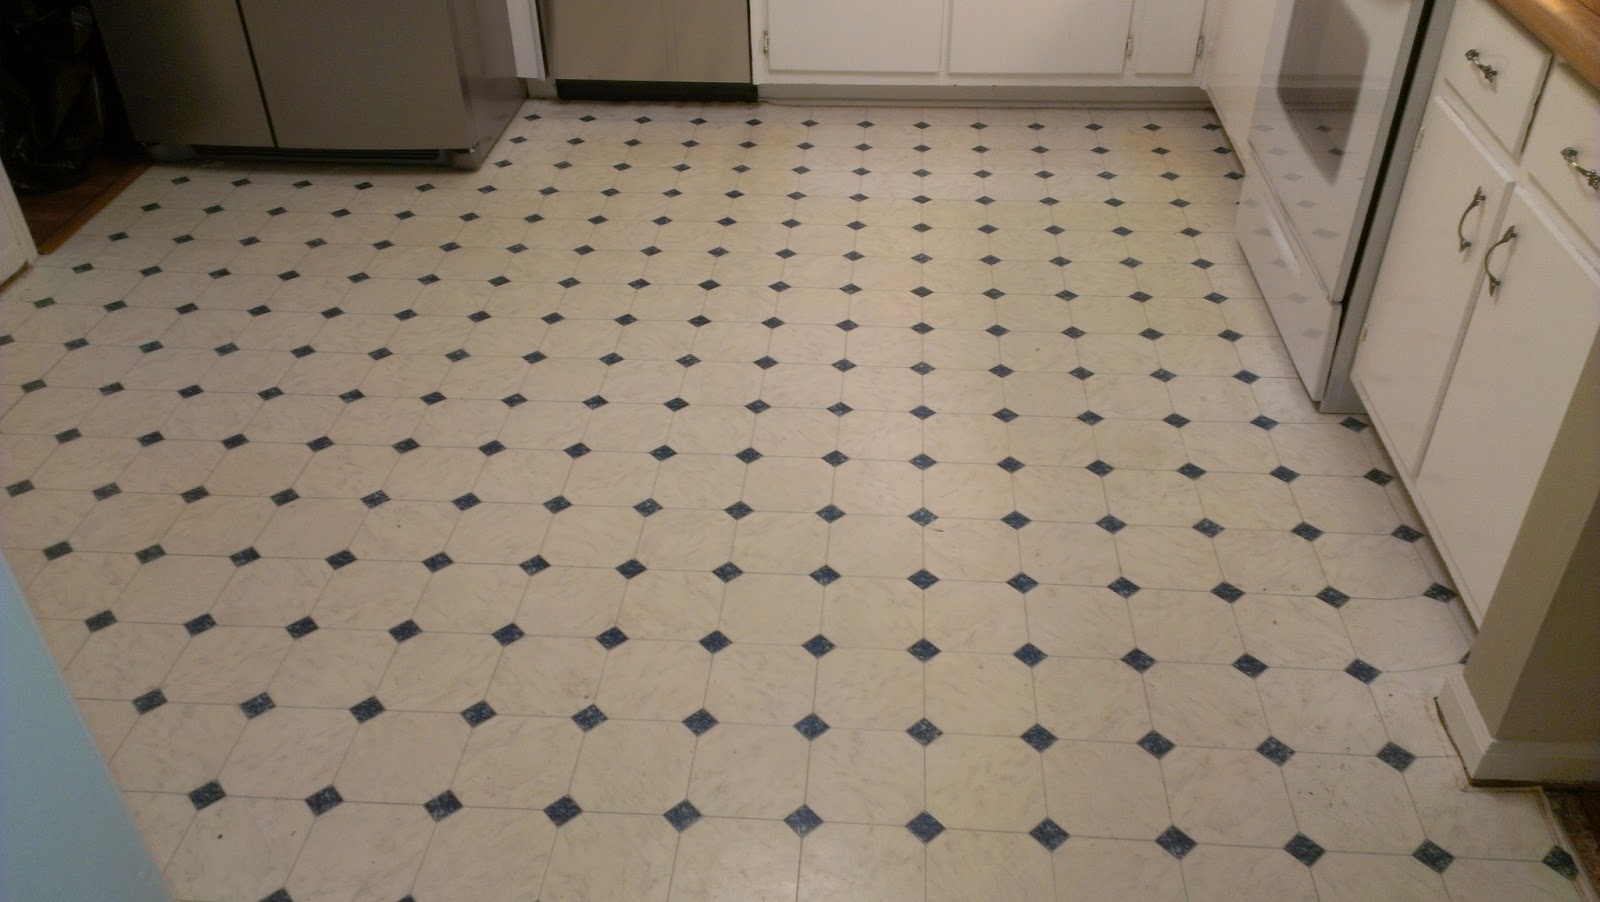
Even though we had the coolest kitchen ever, white fridge, white dishwasher, white stove, white cabinets, white floor,  we decided to change it up a bit...


 First, we destroyed the old one and insulated the walls...


This floor was hard to part with...


One light in the kitchen was awesome, but we added a few anyway..


No pantry was fun, but we added one just for the hell of it..


Walls and ceiling primed. Sherwin Williams Harmony Primer, no VOC's. There are absolutely no paint odors whatsoever! Incredible.


The fun stuff!!


 Tubby did not help.


Thursday, January 31, 2013

Kitchen Work

 Old soffit will be removed later and upper cabinet will be 3' tall.
 Old cabinets demo'd and wall being primed.


Space where the old cabinet used to be. There were gaps behind the wall at the floor that were once open to crawl space. All gaps have been sealed with spray foam insulation.


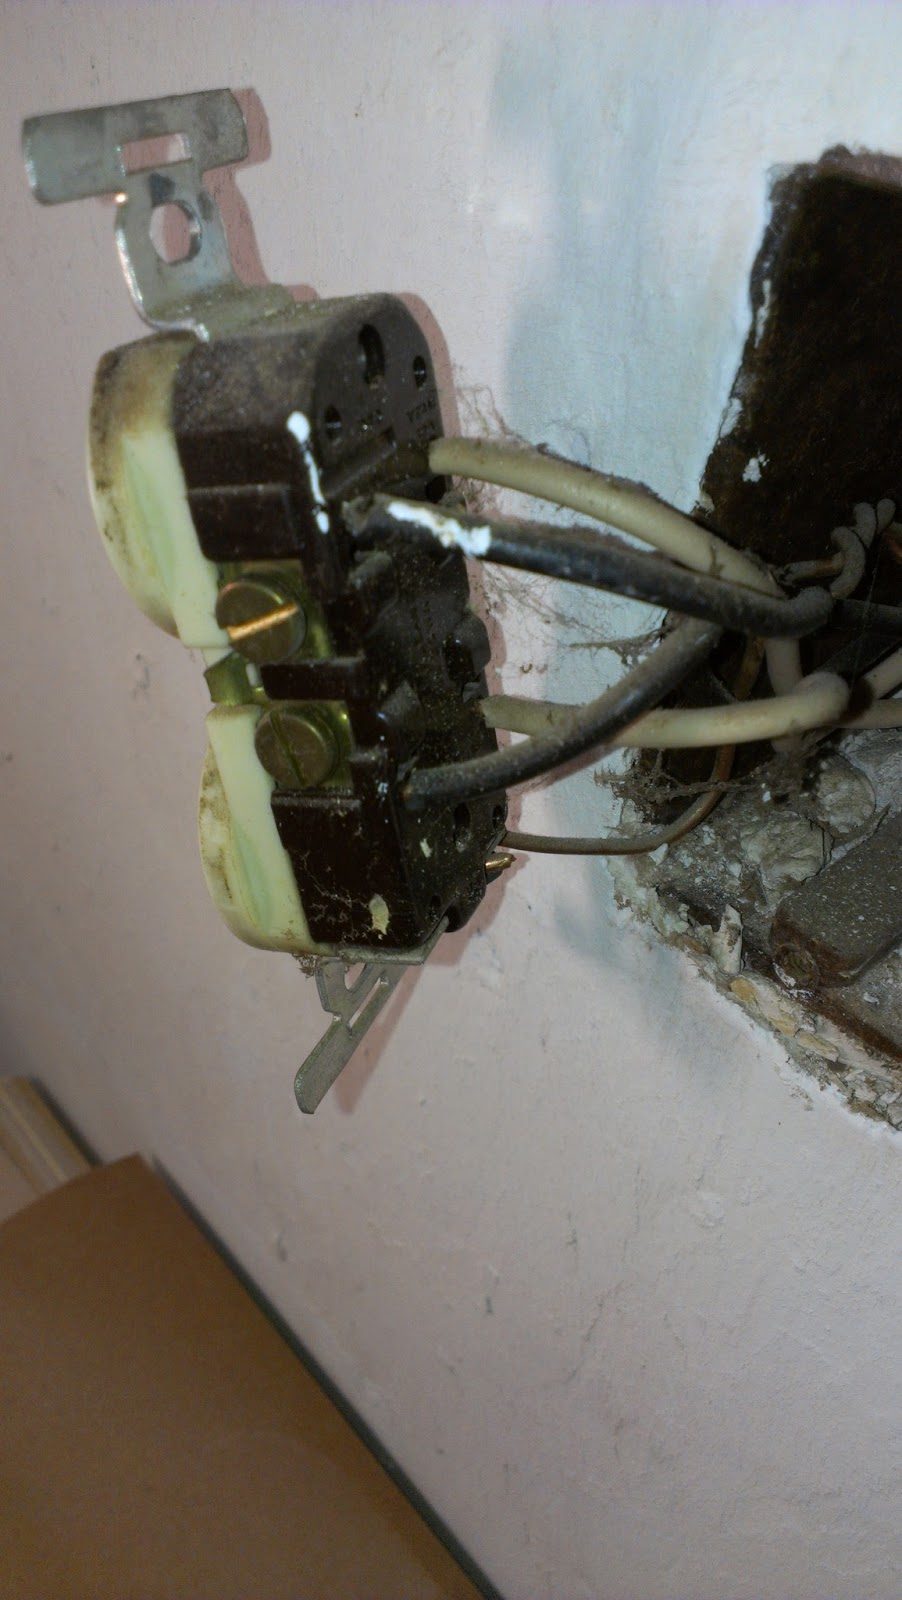
As usual even the old outlet and electrical box is nasty. The box is filled with debris. The outlet is original, so forty years old. I replaced it with a new one.