Showing posts with label renovation. Show all posts

Saturday, December 12, 2015

Den windows

Finally the windows for the large first floor room are installed! I guess we saved the best for last.

These windows are really large, about 6 ft x 3 ft.

I returned once again to Marvin for these windows since I've really been impressed with the french door we bought from them. Plus, they deliver to the house for free!

All of the trim had been removed on the inside of the house a long time ago when we replaced the drywall. So there wasn't really any work to do on the inside. On the outside we had to remove the brick molding and then use a sawzall to cut the nails or whatever was holding the window in.

So I go the brick molding off of the windows and started trying to determine where the fasteners were with a skinny piece of stick. I went all the way around the window and didn't feel anything. I couldn't see anything either. The reason was because there was nothing holding the windows into the frame! They were sitting on the sill. For the last forty years they've sat in the hole not a single screw or nail holding them in place!

Of all the things that I've seen in remodeling this house nothing surprises me anymore, but I couldn't believe this one. I guess the only thing holding the windows in place all that time was the trim on the inside and the brick molding on the outside. No wonder these windows wouldn't raise.

The new windows came with a nailing fin that is suppose to be really for new construction. But I had enough room around the window, since they weren't quite as big as the old ones, to utilize the fin. I have to say it is very convenient. I had the fin on the kitchen window but I didn't use it. It would have made that job much simpler. The french door might have had one too, I can't remember now.

The windows are very nice. The exterior is already the color that you select, I went with bronze. The inside is unfinished pine that is stainable. Screens are integral and are easy to remove. No grids.

Specs:

U Factor = 0.28
SHGC = 0.32
Visible Transmittance = 0.54


$586 x 2 = $1172


Saturday, June 6, 2015

Stair Refurbish

I put off rehabbing the stairs for a long time for no particular reason. But in terms of bang for the buck it's been the best project to date. It was basically free. I did have to buy two 1 x 8's for the risers and some construction adhesive so maybe $30.

The treads had the same orange-ish looking stain on them that the floor originally had so that had to be sanded off. The upper stairs wasn't nearly as gnarly as the lower one and was pretty easy to sand.

I stained the treads with some natural and used two coats of polycrylic after that. They looked so much better for so little work I decided to tackle the stairs going to the basement which are in far worse condition.

Oak treads are about $25 apiece now so all twelve would've been $300 bucks.

I didn't try too hard to make them look perfect so the imperfections and holes are still in the treads. I did replace the risers because they were going to be problematic to paint. I also found out that they were originally cedar. So I am going to repurpose them into birdhouses.

I broke several of the treads prying them up and had to glue them back together which wasn't really a big deal. I had about a five foot long two by four and I baited it up with some short pieces of drop and they pried out lickety split.


Upper staircase
The upper stair on the right after the paint and tread rehab. I also stripped the handrail and refinished it and the brackets as well. The stairs to the basement were by far the worst of the two. After sanding them down they still had lots of discoloration so I stained those a dark walnut.
Lower staircase
The contrast with the white risers ended up being just fine though I wasn't sure how it was going to turn out.

The space behind the upper stair was filthy. I think they swept the first floor dirt under there before they sealed it up. It was like a time capsule with Coke bottles and soda cans.

It's been awhile since I've seen a ten ounce coke bottle. My grandaddy had a Coke machine in his shop that kept them right at freezing and they only cost a dime. Those were good Coca Colas!

Saturday, May 9, 2015

Half wall


I built a half wall to hold books. I am going to add a top to it later when I find the right piece of wood.

At one time there was a wall there that we demo'd. So underneath it the flooring is chopped up. It serves as storage and covers the spot where the original wall used to be.


Here is my hand sketch for the half wall.

It probably took thirty seconds to sketch this out and it would take that long just to open Sketchup.

So most of the time it just simply a lot quicker to sketch on an envelope than it is to bother using Sketchup.


There will be a top added later.

Tuesday, May 5, 2015

Shoji Door

 I had this shoji door built for me by Cherry Tree Design.

It is for the pantry. It's built from walnut.

Cost $800.

This door was suppose to arrive about a week ago. I had been tracking it and I knew that it was already in town. I called them and they said it was going to arrive at lunch. Never came. Next day, nothing. I called them back. It was coming on a smaller truck. Never showed up. Called them back, it was coming tomorrow. Never came. Called them back. It would be here Monday.


By this time I knew there was a problem and I figured they had damaged it. They did. Cherry Tree didn't start building doors yesterday. Apparently they've had damaged shipments in the past. So they put a sticker on the crate that turns red if the shipment gets jarred.

When the truck showed up I could see the crate but I didn't see the sticker so I knew it was on the opposite side, they were trying to hide it. I walked around on the other side and saw that it was indeed red. I told the driver I had to note it on the ticket. He promptly wrote in "Shock monitor red - no apparent damage". This was suspect.

Backside of OSB crate lid
I looked over the crate which was well made out of OSB. There was a gouge in the top of the box just below the warning sticker. If you look closely you can make it out.
On the left you can see the inside part of the lid where it protruded through about an inch. It didn't puncture the door but I think the paper got stretched because it isn't tight like it should be.

Hole in OSB crate
I realize that loads shift in transit and that it was purely accidental. But they went out of their way to conceal it from me and the vendor, that's the part I can't stand. I lost a lot of time waiting on them to deliver it.

I'll never use Conway to ship anything

Sunday, March 29, 2015

Backsplash

We installed a marble tile mosaic in the kitchen for the backsplash. It was a total of about 27 square feet.
 Each box of tile contained 10 square feet of tile so we boght three boxes. It was $12/box. We laid the tile on the first day and then grouted it on the second day. We added the grout optimizer to the grout too. It is suppose to keep any stains from ever happening on the grout. We used unsanded grout.
We used a diamond cutting wheel on an angle grinder to cut the pieces so a tile saw wasn't necessary. Before grouting we applied sealer to the marble.


It's good to use a razor scraper and a light to make sure all the mastic is off the tile. There is a lot you won't be able to see until you get very close with a light you can hold in your hand.


Before
The simplest thing to do to span the gap between the cabinets where the stove goes is to screw a piece of scrap wood to the wall to rest the tile on. We just used a piece of scrap plywood.

Cost, around $500.


Now that's white!


A while ago the backsplash was white plastic glued to the wall. Perfectly functional but not a whole lot of character.


Thursday, November 13, 2014

Kitchen Update

A couple of weeks ago the new undermount kitchen sink arrived.

It's a Rohl Fireclay single compartment sink. It and the mounting brackets were about $700. Fireclay is suppose to be nearly indestructible and resists chipping like enameled cast iron does.
I can attest to the fact that it is much lighter. I was able to set the sink in place alone.

Delivery was free from Allmodern.com.

The old sink was a top mounted sink that came with the house that we had been using for the last two years.

Since the cabinet top was cut out for the old sink, I had to butcher the cabinet to mount the new sink. It doesn't matter though since it will be covered by the countertops.

Counter top installation
Speaking of which, arrived today. A few weeks ago we went to a counter place and ordered some granite countertops, finally. I'm not going to mention the business because I'm not happy with their customer relations. Actually, I didn't even go to the place that I had meant to go to because I read the map wrong (but that's another issue).

Anyway, the installers finally showed up this afternoon as the weather was turning wretchedly cold and windy. In about an hour they had the tops installed and polished. I can't say that I'm over the moon with the install. I've seen some discolorations that I'm not happy about.

They use a very acrid epoxy to join the seams with and it gave me a headache and stunk up the house for a long while.

It is nice to have some counters finally and we are happy about that.

The granite plus installation was about $1200.

The new kitchen faucet is a Grohe Concetto, which is a German mfg. but the product is made in Canada.

The faucet was about $300.

It's very nice quality and has a retractable spray head in the nozzle.

We opted to go with the deepest sink we could find which is 10".

I use a lot of big pots and pans and a two compartment sink is a real hindrance when trying to wash them out.  Hopefully this large sink will meet our needs a little better than the old sink.

Next up...tiling the backsplash. Whoopee!


Wednesday, September 24, 2014

Bathroom


 Finally the light fixture arrived! Besides one or two other additional things that aren't fixtures we are basically finished with the bathroom renovation.

The final cost was around $3500, less labor of course.

A little bit of touchup work needs to be done but it's minor. We'll probably just leave it as is for a guest bath and not a master bath.

It's not perfect but I'm glad to be done with it. The tile is probably the weakest link. I learned a lot about it by doing it, so the next tile job will be better.


bye bye 1971!

Monday, August 4, 2014

Bath Fixtures


Allmodern.com is a cool site that has tons of manufacturers from Europe that might not ordinarily come to mind when searching for fixtures. They typically offer free shipping on most of their items.

New wall mounted sink by Cermica Tecla about $300.


New one piece TOTO water closet from Noland, $550. Super quiet!


Noland is a showroom near spaghetti junction that carries a lot of nice fixtures for bathrooms. They carry lots of high end fixtures and there is rarely even anybody in there looking around. It's off the beaten path.


The wall mounted sink was fairly easy to install. The Hansgrohe faucet came with the pop up drain and tail piece, which is important because a lot of manufacturers don't include them. The instructions were pretty clear and not hard to follow. It took about 30 minutes to connect the tailpiece and the pop up drain.

Hansgrohe faucet $150.


Tuesday, July 8, 2014

A Bit of Comparison


Sometimes when you get in the middle of a project its easy to forget the reason why you decided to tackle it in the first place. Thats why it's important to always document the before.

It's not hard to run out of steam sometimes doing renovation especially when things seem to always end up being more expensive than you had planned for.

Taking a step back and looking at the transformation is sometimes needed in case your focus seems to be wandering a bit.

Friday, June 20, 2014

Bathroom Demolition

Original bath

Demolishing the shower was not easy. The mortar bed that they installed in some places was over an inch thick. It was dry as a bone after 40 years. The tiler on this job did not get any call-backs I believe.

The amount of weight all of the mortar adds is incredible. The new materials will be a lot lighter.

There's at least one layer of wallpaper that's been painted over so all of the drywall has to go.

Behind the shower wall you can see the roof line of the first floor. (note the angled section). This wall gets really hot from the exterior. This will get another 2" of rigid foam insulation before the shower goes back in.

Sanitary waste and vent stack
I don't have the heart to smash the cast iron tub with a sledgehammer, so it stays.

That bundle of wires is heading down to the panel box. The new code doesn't allow any plumbing to be above any electrical.
Hot & cold water supplies


All the plumbing behind the walls is in good shape.

Wednesday, May 21, 2014

Rip-off

You might ask why we go to all the trouble to add so many energy efficient products to the house. Well, when you are beholden to Georgia Power for your electrical service you've got to cut costs wherever you can because they certainly won't.

With the Nuclear Construction Cost Recovery fee that the Public Service Commision allowed we are pre-paying for Southern Company's new nuclear plants at Vogtle.

So our bills are up 6.5%, there are already cost overruns with the construction and we will certainly shoulder any additional costs in the future. The fee percentage goes up each year, so our bills will be higher again next year.

I thought more supply meant lower prices...


Tuesday, May 13, 2014

French Door


The door really gives the room a more spacious feel, which I wasn't really expecting. It swings out so it suppose to resist wind and being kicked in. Actually the more exterior pressure exerted the tighter it seals. Aesthetically it's really cool. Lots of light and the open quality of the room increased exponentially. It fits.

Integrity Wood Ultrex Outswing French Door by  Marvin, outswing double patio door, $2220, delivered.

Low E 272 w/Argon
SHGC .24
U Value - .30
VT - .40

Wednesday, March 19, 2014

Not Pretty

Since we bought the house, I've known that the soffit was rotted out underneath the valley where the garage is attached.

I haven't been able to address it because of the very steep slope and rough terrain that was beneath that area. Since the deck has been extended out over that tough terrain it is now much easier to work on the eaves there.

Today I got started demolishing the rotted out sections. The gutter had to be taken down and it's the main reason for the problem as well.

The fascia is toast, and a lot of the soffit has to be replaced. Some of the rafter tails are in bad shape and need replacing. But the rafters are okay and the decking is in good shape.

It's not in too bad a condition. They went to great lengths to hide the damage which was mostly the fascia. It would have been as a simple or even easier fix to just have done it right.


It's what I've come to expect though. I've found lots of shoddy work throughout this house that could have been just as easily done correctly. It's laziness. Cutting corners never saves any money, in the long run.

On the upside, I will be able to add another couple of inches of rigid foam insulation before I button everything back up. This will add some significant R value to an otherwise weak point in the wall system that I could not reach from the interior.

The air sealing that I did last year was visible after removing the soffit and it was a good job. I didn't see any voids or crevices that air could be moving through, I'm happy to report.

Being able to seal and insulate from the exterior will be a bonus that I didn't think about until I had the eave demo'd.

Monday, August 5, 2013

Kitchen Update


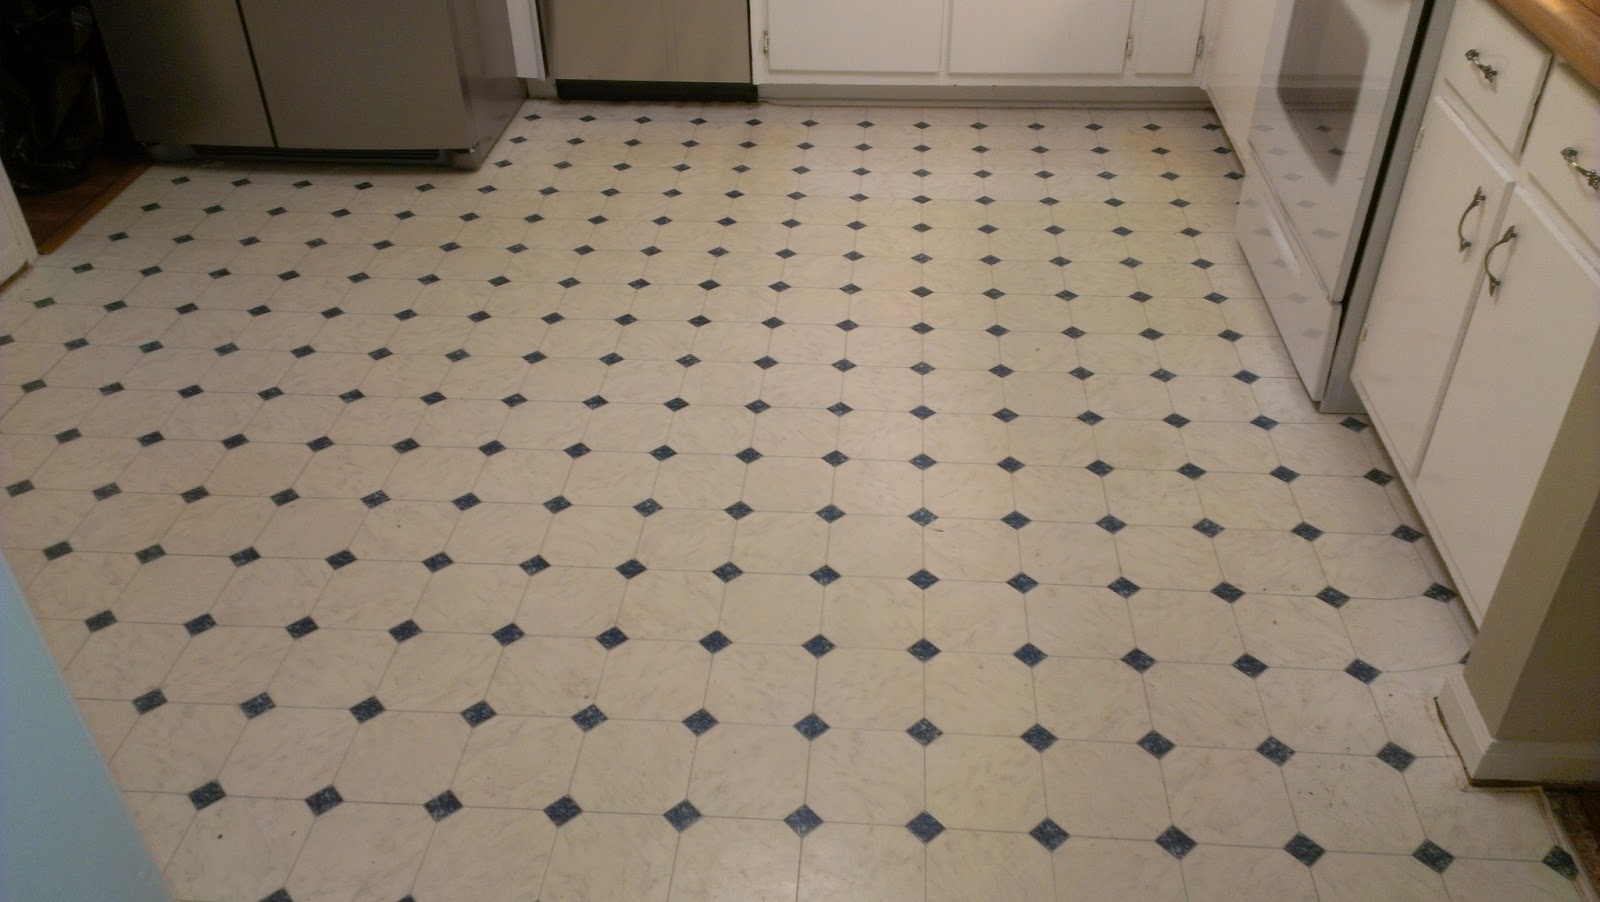
Even though we had the coolest kitchen ever, white fridge, white dishwasher, white stove, white cabinets, white floor,  we decided to change it up a bit...


 First, we destroyed the old one and insulated the walls...


This floor was hard to part with...


One light in the kitchen was awesome, but we added a few anyway..


No pantry was fun, but we added one just for the hell of it..


Walls and ceiling primed. Sherwin Williams Harmony Primer, no VOC's. There are absolutely no paint odors whatsoever! Incredible.


The fun stuff!!


 Tubby did not help.