Sunday, March 29, 2015

Backsplash

We installed a marble tile mosaic in the kitchen for the backsplash. It was a total of about 27 square feet.
 Each box of tile contained 10 square feet of tile so we boght three boxes. It was $12/box. We laid the tile on the first day and then grouted it on the second day. We added the grout optimizer to the grout too. It is suppose to keep any stains from ever happening on the grout. We used unsanded grout.
We used a diamond cutting wheel on an angle grinder to cut the pieces so a tile saw wasn't necessary. Before grouting we applied sealer to the marble.


It's good to use a razor scraper and a light to make sure all the mastic is off the tile. There is a lot you won't be able to see until you get very close with a light you can hold in your hand.


Before
The simplest thing to do to span the gap between the cabinets where the stove goes is to screw a piece of scrap wood to the wall to rest the tile on. We just used a piece of scrap plywood.

Cost, around $500.


Now that's white!


A while ago the backsplash was white plastic glued to the wall. Perfectly functional but not a whole lot of character.


Monday, March 2, 2015

New Kitchen Cabinets


Top new, bottom old 
I've been busy lately building new cabinets to replace two in the kitchen. The two wall cabinets in the corner are the wrong size.

When I built them I didn't factor in the thickness of the doors. I could slide them over but then the window would not be centered and on the other side of the wall the vent hood wouldn't be centered.

It's not a bad thing though because I put one in my office and the other one is in the laundry room.

I still have the refrigerator cabinet enclosure to build as well. We haven't decided on a door style yet either. Slab door seem the most fitting but they're also the most expensive. It hasn't been bad not having cabinet doors however and I've noticed that lots of people are forgoing them altogether these days. But the base cabinets definitely need doors.


Sunday, February 22, 2015

Sketchup

3D Birdhouse modeled in Sketchup
I've seen so much lately about Sketchup that I decided that I should look into it.

I have been using AutoCAD since version 10 in the early nineties. Needless to say, I'm somewhat entrenched in ACAD's operation.

I think that is a hinderance to someone just starting out in Sketchup.

I first learned how to draft on a board with paper and pencil. AutoCAD is, or was, basically just a virtual piece of paper. All 2D. So you still had to be proficient at visualizing sections and elevations.

ACAD always tried to incorporate some 3D functions into the program but I always found them cumbersome and nobody used it for that. There were third party programs that were much better.

Sketchup sort of bypasses the drafting aspect and is a full on modeling environment. Trying to do a simple blueprint in Sketchup is not really worth the effort. It isn't set up for that. It's a model, not a drawing. That hung me up, a lot. I'm used to drawing everything with lines, not building it with shapes. The interface takes a lot from AutoCAD, there are lots of similarities.

I've spent a few days becoming acquainted with Sketchup and I've watched a lot of tutorials on Youtube as well. The birdhouse rendering is the result of the last two days. I could have built fifty real birdhouses in the time it's taken me to model it. But I'm starting to get the hang of it.

I probably sketch some idea out on paper at least once a day just to hash it out a bit. If it turns into something that I want to build I usually take the hand drawing and lay it out to scale in AutoCAD. Then I can usually find anything I might not have considered when I sketched it. I can usually get a shop drawing knocked out in an hour or less with CAD, depending on the complexity. I have the entire house drawn and I refer back to it constantly, especially the kitchen, where I actually have all the cabinet elevations drawn.

If I tried to model the kitchen in Sketchup it would take me forever and it would be hard to get it completely accurate. It just wouldn't be worth the time and effort. I'm sure someone could do it in no time. Most of the time however, I just don't have a need for a model. But I have several projects that I've been thinking of for a while that might be good candidates.

And Sketchup has a lot of cool features that might be of benefit to me in the future. It has a feature that enables you to bring in a site from Google maps that could be very helpful. Plus, I have seen a lot of awesome looking work that people have done with it who aren't engineers or architects, just folks who like to design. That's what the price tag of Sketchup enables. Cost, free!


Tuesday, January 20, 2015

Free cabinets!

So while driving to the store on Sunday I noticed a heap of cabinets on the side of the road that looked promising. I went back later on and they were in good shape so I loaded them up.

It looked like maybe a bathroom vanity that had never even been used. They weren't box store either, they were custom built, but not too expensive. The face frames are maple.

I have been reworking the garage to get more use of the space as a workshop and I recently finished some wall cabinets. I was just on the verge of building a base cabinet when I found this one.
Today I leveled the cabinet and mounted it to the wall. I mounted a piece of 3/4" plywood on top. I'm banding the edge with some thin walnut I had left from another project.

The drawers were on the pile but they were all busted up and looked cheap so I didn't pick them up. Today I decided that I am going to just hang doors on the cabinet and put a shelf in the middle and forego the drawers.

There were also four unfinished cabinet doors in the same pile. They didn't match the other stuff so they were probably from another part of the house.

I was going to eventually build doors for the wall cabinets that I just built. The doors are 36" which is the same height as the wall cabinet so I can probably just build a face frame for the wall cabinet and make them work too.

So thanks to the person I don't know who tossed out perfectly good cabinets and saved me lots of time and money!

Saturday, December 6, 2014

Cooking With Gas!


Samsung Gas Range
The old electric stove died right in the middle of cooking supper last Saturday night!

I could have probably fixed it but I had already paid for the new gas range the previous Wednesday.

This past week has been nightly cookouts on the deck. Not too bad of a week for it since it's been very mild lately. Nonetheless, building a charcoal fire five nights in a row gets old fast.

Ironically, I believe the house originally had a gas stove.

The new Samsung stove was a little over $700.  I probably had $60 in pipe and fittings to extend the gas into the kitchen.

We love it!


Thursday, November 13, 2014

Kitchen Update

A couple of weeks ago the new undermount kitchen sink arrived.

It's a Rohl Fireclay single compartment sink. It and the mounting brackets were about $700. Fireclay is suppose to be nearly indestructible and resists chipping like enameled cast iron does.
I can attest to the fact that it is much lighter. I was able to set the sink in place alone.

Delivery was free from Allmodern.com.

The old sink was a top mounted sink that came with the house that we had been using for the last two years.

Since the cabinet top was cut out for the old sink, I had to butcher the cabinet to mount the new sink. It doesn't matter though since it will be covered by the countertops.

Counter top installation
Speaking of which, arrived today. A few weeks ago we went to a counter place and ordered some granite countertops, finally. I'm not going to mention the business because I'm not happy with their customer relations. Actually, I didn't even go to the place that I had meant to go to because I read the map wrong (but that's another issue).

Anyway, the installers finally showed up this afternoon as the weather was turning wretchedly cold and windy. In about an hour they had the tops installed and polished. I can't say that I'm over the moon with the install. I've seen some discolorations that I'm not happy about.

They use a very acrid epoxy to join the seams with and it gave me a headache and stunk up the house for a long while.

It is nice to have some counters finally and we are happy about that.

The granite plus installation was about $1200.

The new kitchen faucet is a Grohe Concetto, which is a German mfg. but the product is made in Canada.

The faucet was about $300.

It's very nice quality and has a retractable spray head in the nozzle.

We opted to go with the deepest sink we could find which is 10".

I use a lot of big pots and pans and a two compartment sink is a real hindrance when trying to wash them out.  Hopefully this large sink will meet our needs a little better than the old sink.

Next up...tiling the backsplash. Whoopee!


Monday, October 20, 2014

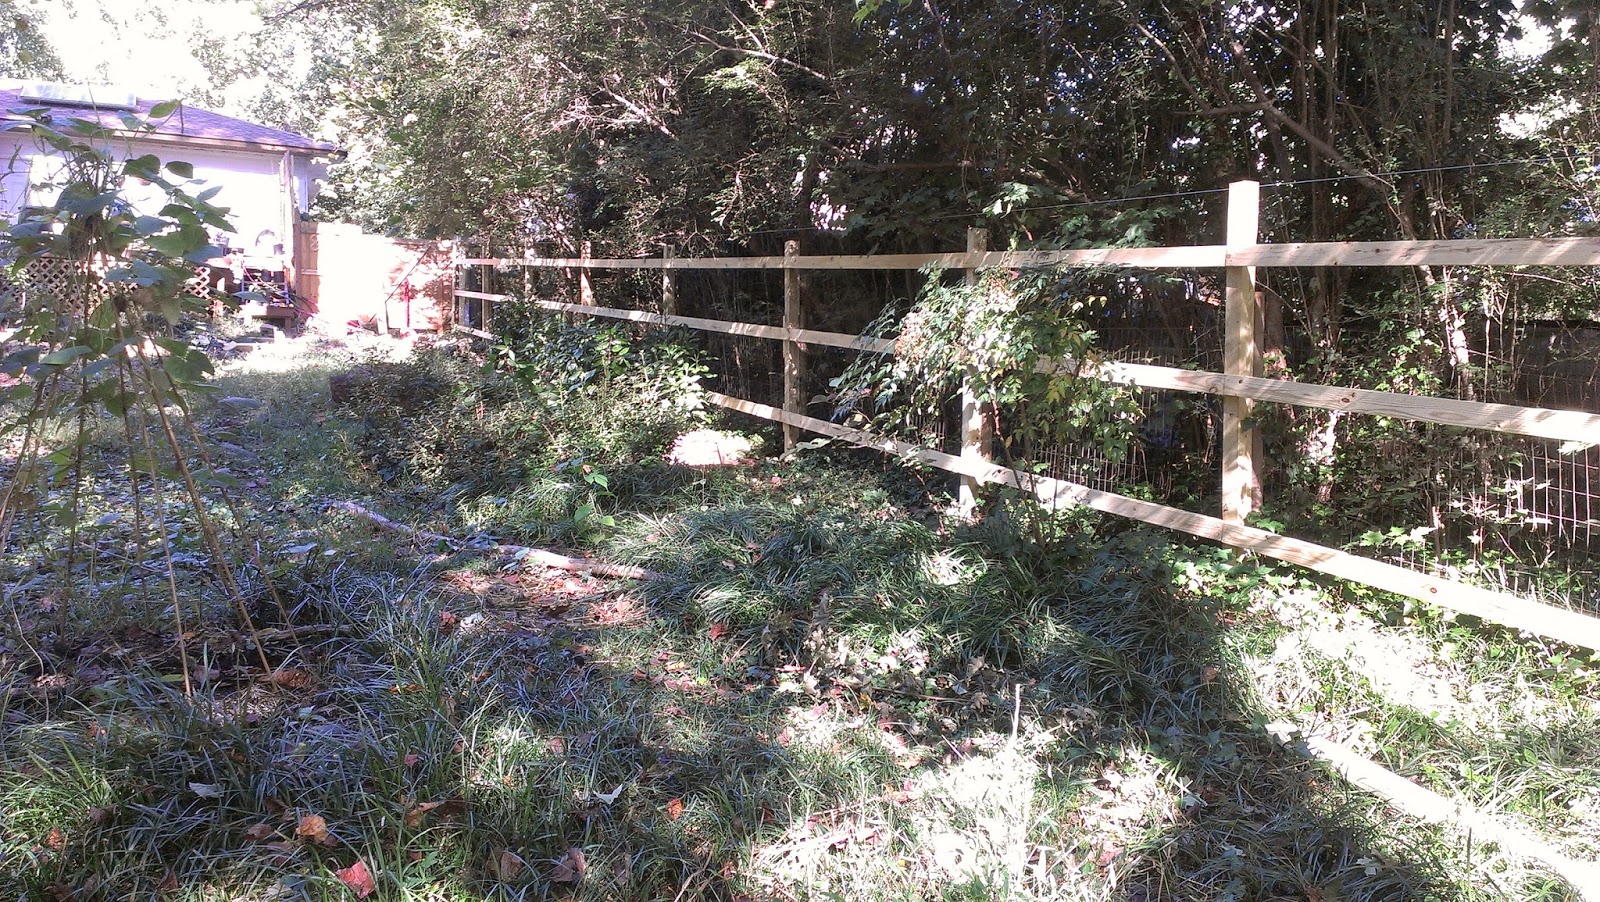
Fence Addition


I began working on the side fence last week. My neighbor suggested it after seeing the first one I built in the back. We're splitting the materials.

There was already a wire fence between the two yards that has been there for a while. I decided to bolt the new posts against the existing ones to avoid extra digging.

Cost of materials $800.