Saturday, December 12, 2015

Den windows

Finally the windows for the large first floor room are installed! I guess we saved the best for last.

These windows are really large, about 6 ft x 3 ft.

I returned once again to Marvin for these windows since I've really been impressed with the french door we bought from them. Plus, they deliver to the house for free!

All of the trim had been removed on the inside of the house a long time ago when we replaced the drywall. So there wasn't really any work to do on the inside. On the outside we had to remove the brick molding and then use a sawzall to cut the nails or whatever was holding the window in.

So I go the brick molding off of the windows and started trying to determine where the fasteners were with a skinny piece of stick. I went all the way around the window and didn't feel anything. I couldn't see anything either. The reason was because there was nothing holding the windows into the frame! They were sitting on the sill. For the last forty years they've sat in the hole not a single screw or nail holding them in place!

Of all the things that I've seen in remodeling this house nothing surprises me anymore, but I couldn't believe this one. I guess the only thing holding the windows in place all that time was the trim on the inside and the brick molding on the outside. No wonder these windows wouldn't raise.

The new windows came with a nailing fin that is suppose to be really for new construction. But I had enough room around the window, since they weren't quite as big as the old ones, to utilize the fin. I have to say it is very convenient. I had the fin on the kitchen window but I didn't use it. It would have made that job much simpler. The french door might have had one too, I can't remember now.

The windows are very nice. The exterior is already the color that you select, I went with bronze. The inside is unfinished pine that is stainable. Screens are integral and are easy to remove. No grids.

Specs:

U Factor = 0.28
SHGC = 0.32
Visible Transmittance = 0.54


$586 x 2 = $1172


Tuesday, September 29, 2015

Island bar


 The island/bar is finally in place in the kitchen. I had nearly a whole sheet of the bamboo plywood left over from the cabinet door project and I put it to good use for the island.

The maple butcher block top is from another project that I was working on. The top was damaged in shipping and they sent me another one and said that I could keep the damaged one. So I flipped it over and used it for the bar top.

I used about six coats of semi-gloss poly on the surface. It came out pretty nice.


I built the shelf out of some of the drop from the bamboo plywood and the toe kick as well. I could add some doors to it eventually but I think I am going to leave it open.
We bought a couple of stools from Ikea which worked out very nicely. It's become our main eating area now.


Maple butcher block
The best thing about it is that it creates a good bit more storage space for large pots and utensils like the food processor. That is a big plus!

We love it.

Thursday, September 17, 2015

Grille Inlays

For a long time the grilles have been laying on top of the floor. They don't sit up too high, about an eighth of an inch but they need to be flush.

It was a job I wasn't looking forward to but the time had come.

I had to rout out the oak flooring so that the grilles would sit down flush with the floor. On this particular grille I had to create an inlay because the floor was gapped where the vent was.  At one time this was actually a wall so the flooring stopped where the bottom plate of the wall was at. Since the drywall on the wall was 1/2" thick it covered the gaps. Once the wall was gone it looked irregular and the grille didn't cover the entire vent hole in the floor.

I firred out the difference with about a 1/2" strip of oak inlay to compensate for the gap.
Then I cut a rabbet in the inlay so that the grille would sit flush with the floor. It was a lot of work. The routing was the worst part.

I put a piece of 1/4 ply on the floor against a pencil line that I had marked around the grille. At first I nailed it to the floor with brads so it wouldn't move. But I found out that I didn't need to do that. A little bit of tape and my weight kneeling on it worked fine. It was tedious and made a big mess.

It ended up working out okay though. The other two grilles did entirely cover up the holes in the floor so I didn't make inlays for those. I just routed them so the vents would sit flush with the floor.

Details....

Sunday, July 26, 2015

Cabinet Doors


Finally, the cabinet doors are finished! I deliberated for a long time on what to make them out of. In the end I went with bamboo plywood from CaliBamboo out of my birthplace, San Diego, California. The sheets weren't cheap, over $200 apiece.

Initially we wanted to not have any pulls on the doors so I beveled the cuts about 17 degrees. It worked okay on the top doors but didn't really work on the bottom cabinets. I ended up using some pulls I bought from Ikea.

All of the hardware is Blum. Each door has the softclose feature which is really nice. I also added one drawer above the trash which is to the left of the stove.

I used Mylands wax polish to finish them with but I have since found out that it isn't going to work well in the kitchen, it's too soft. So I am not sure what I'll end up doing for that. I do like the color and feel the wax gives them.


Raw Cali Bamboo plywood, awesome material! Super heavy and very hard.


Nearly what I envisioned when we bought this house when it looked like it did on the left. It's a nice space now and we really like it.


Saturday, June 6, 2015

Stair Refurbish

I put off rehabbing the stairs for a long time for no particular reason. But in terms of bang for the buck it's been the best project to date. It was basically free. I did have to buy two 1 x 8's for the risers and some construction adhesive so maybe $30.

The treads had the same orange-ish looking stain on them that the floor originally had so that had to be sanded off. The upper stairs wasn't nearly as gnarly as the lower one and was pretty easy to sand.

I stained the treads with some natural and used two coats of polycrylic after that. They looked so much better for so little work I decided to tackle the stairs going to the basement which are in far worse condition.

Oak treads are about $25 apiece now so all twelve would've been $300 bucks.

I didn't try too hard to make them look perfect so the imperfections and holes are still in the treads. I did replace the risers because they were going to be problematic to paint. I also found out that they were originally cedar. So I am going to repurpose them into birdhouses.

I broke several of the treads prying them up and had to glue them back together which wasn't really a big deal. I had about a five foot long two by four and I baited it up with some short pieces of drop and they pried out lickety split.


Upper staircase
The upper stair on the right after the paint and tread rehab. I also stripped the handrail and refinished it and the brackets as well. The stairs to the basement were by far the worst of the two. After sanding them down they still had lots of discoloration so I stained those a dark walnut.
Lower staircase
The contrast with the white risers ended up being just fine though I wasn't sure how it was going to turn out.

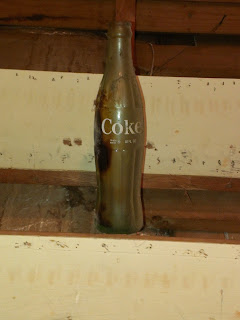
The space behind the upper stair was filthy. I think they swept the first floor dirt under there before they sealed it up. It was like a time capsule with Coke bottles and soda cans.

It's been awhile since I've seen a ten ounce coke bottle. My grandaddy had a Coke machine in his shop that kept them right at freezing and they only cost a dime. Those were good Coca Colas!

Saturday, May 9, 2015

Half wall


I built a half wall to hold books. I am going to add a top to it later when I find the right piece of wood.

At one time there was a wall there that we demo'd. So underneath it the flooring is chopped up. It serves as storage and covers the spot where the original wall used to be.


Here is my hand sketch for the half wall.

It probably took thirty seconds to sketch this out and it would take that long just to open Sketchup.

So most of the time it just simply a lot quicker to sketch on an envelope than it is to bother using Sketchup.


There will be a top added later.

Tuesday, May 5, 2015

Shoji Door

 I had this shoji door built for me by Cherry Tree Design.

It is for the pantry. It's built from walnut.

Cost $800.

This door was suppose to arrive about a week ago. I had been tracking it and I knew that it was already in town. I called them and they said it was going to arrive at lunch. Never came. Next day, nothing. I called them back. It was coming on a smaller truck. Never showed up. Called them back, it was coming tomorrow. Never came. Called them back. It would be here Monday.


By this time I knew there was a problem and I figured they had damaged it. They did. Cherry Tree didn't start building doors yesterday. Apparently they've had damaged shipments in the past. So they put a sticker on the crate that turns red if the shipment gets jarred.

When the truck showed up I could see the crate but I didn't see the sticker so I knew it was on the opposite side, they were trying to hide it. I walked around on the other side and saw that it was indeed red. I told the driver I had to note it on the ticket. He promptly wrote in "Shock monitor red - no apparent damage". This was suspect.

Backside of OSB crate lid
I looked over the crate which was well made out of OSB. There was a gouge in the top of the box just below the warning sticker. If you look closely you can make it out.
On the left you can see the inside part of the lid where it protruded through about an inch. It didn't puncture the door but I think the paper got stretched because it isn't tight like it should be.

Hole in OSB crate
I realize that loads shift in transit and that it was purely accidental. But they went out of their way to conceal it from me and the vendor, that's the part I can't stand. I lost a lot of time waiting on them to deliver it.

I'll never use Conway to ship anything