Saturday, December 12, 2015

Den windows

Finally the windows for the large first floor room are installed! I guess we saved the best for last.

These windows are really large, about 6 ft x 3 ft.

I returned once again to Marvin for these windows since I've really been impressed with the french door we bought from them. Plus, they deliver to the house for free!

All of the trim had been removed on the inside of the house a long time ago when we replaced the drywall. So there wasn't really any work to do on the inside. On the outside we had to remove the brick molding and then use a sawzall to cut the nails or whatever was holding the window in.

So I go the brick molding off of the windows and started trying to determine where the fasteners were with a skinny piece of stick. I went all the way around the window and didn't feel anything. I couldn't see anything either. The reason was because there was nothing holding the windows into the frame! They were sitting on the sill. For the last forty years they've sat in the hole not a single screw or nail holding them in place!

Of all the things that I've seen in remodeling this house nothing surprises me anymore, but I couldn't believe this one. I guess the only thing holding the windows in place all that time was the trim on the inside and the brick molding on the outside. No wonder these windows wouldn't raise.

The new windows came with a nailing fin that is suppose to be really for new construction. But I had enough room around the window, since they weren't quite as big as the old ones, to utilize the fin. I have to say it is very convenient. I had the fin on the kitchen window but I didn't use it. It would have made that job much simpler. The french door might have had one too, I can't remember now.

The windows are very nice. The exterior is already the color that you select, I went with bronze. The inside is unfinished pine that is stainable. Screens are integral and are easy to remove. No grids.

Specs:

U Factor = 0.28
SHGC = 0.32
Visible Transmittance = 0.54


$586 x 2 = $1172


Tuesday, September 29, 2015

Island bar


 The island/bar is finally in place in the kitchen. I had nearly a whole sheet of the bamboo plywood left over from the cabinet door project and I put it to good use for the island.

The maple butcher block top is from another project that I was working on. The top was damaged in shipping and they sent me another one and said that I could keep the damaged one. So I flipped it over and used it for the bar top.

I used about six coats of semi-gloss poly on the surface. It came out pretty nice.


I built the shelf out of some of the drop from the bamboo plywood and the toe kick as well. I could add some doors to it eventually but I think I am going to leave it open.
We bought a couple of stools from Ikea which worked out very nicely. It's become our main eating area now.


Maple butcher block
The best thing about it is that it creates a good bit more storage space for large pots and utensils like the food processor. That is a big plus!

We love it.

Thursday, September 17, 2015

Grille Inlays

For a long time the grilles have been laying on top of the floor. They don't sit up too high, about an eighth of an inch but they need to be flush.

It was a job I wasn't looking forward to but the time had come.

I had to rout out the oak flooring so that the grilles would sit down flush with the floor. On this particular grille I had to create an inlay because the floor was gapped where the vent was.  At one time this was actually a wall so the flooring stopped where the bottom plate of the wall was at. Since the drywall on the wall was 1/2" thick it covered the gaps. Once the wall was gone it looked irregular and the grille didn't cover the entire vent hole in the floor.

I firred out the difference with about a 1/2" strip of oak inlay to compensate for the gap.
Then I cut a rabbet in the inlay so that the grille would sit flush with the floor. It was a lot of work. The routing was the worst part.

I put a piece of 1/4 ply on the floor against a pencil line that I had marked around the grille. At first I nailed it to the floor with brads so it wouldn't move. But I found out that I didn't need to do that. A little bit of tape and my weight kneeling on it worked fine. It was tedious and made a big mess.

It ended up working out okay though. The other two grilles did entirely cover up the holes in the floor so I didn't make inlays for those. I just routed them so the vents would sit flush with the floor.

Details....

Sunday, July 26, 2015

Cabinet Doors


Finally, the cabinet doors are finished! I deliberated for a long time on what to make them out of. In the end I went with bamboo plywood from CaliBamboo out of my birthplace, San Diego, California. The sheets weren't cheap, over $200 apiece.

Initially we wanted to not have any pulls on the doors so I beveled the cuts about 17 degrees. It worked okay on the top doors but didn't really work on the bottom cabinets. I ended up using some pulls I bought from Ikea.

All of the hardware is Blum. Each door has the softclose feature which is really nice. I also added one drawer above the trash which is to the left of the stove.

I used Mylands wax polish to finish them with but I have since found out that it isn't going to work well in the kitchen, it's too soft. So I am not sure what I'll end up doing for that. I do like the color and feel the wax gives them.


Raw Cali Bamboo plywood, awesome material! Super heavy and very hard.


Nearly what I envisioned when we bought this house when it looked like it did on the left. It's a nice space now and we really like it.


Saturday, June 6, 2015

Stair Refurbish

I put off rehabbing the stairs for a long time for no particular reason. But in terms of bang for the buck it's been the best project to date. It was basically free. I did have to buy two 1 x 8's for the risers and some construction adhesive so maybe $30.

The treads had the same orange-ish looking stain on them that the floor originally had so that had to be sanded off. The upper stairs wasn't nearly as gnarly as the lower one and was pretty easy to sand.

I stained the treads with some natural and used two coats of polycrylic after that. They looked so much better for so little work I decided to tackle the stairs going to the basement which are in far worse condition.

Oak treads are about $25 apiece now so all twelve would've been $300 bucks.

I didn't try too hard to make them look perfect so the imperfections and holes are still in the treads. I did replace the risers because they were going to be problematic to paint. I also found out that they were originally cedar. So I am going to repurpose them into birdhouses.

I broke several of the treads prying them up and had to glue them back together which wasn't really a big deal. I had about a five foot long two by four and I baited it up with some short pieces of drop and they pried out lickety split.


Upper staircase
The upper stair on the right after the paint and tread rehab. I also stripped the handrail and refinished it and the brackets as well. The stairs to the basement were by far the worst of the two. After sanding them down they still had lots of discoloration so I stained those a dark walnut.
Lower staircase
The contrast with the white risers ended up being just fine though I wasn't sure how it was going to turn out.

The space behind the upper stair was filthy. I think they swept the first floor dirt under there before they sealed it up. It was like a time capsule with Coke bottles and soda cans.

It's been awhile since I've seen a ten ounce coke bottle. My grandaddy had a Coke machine in his shop that kept them right at freezing and they only cost a dime. Those were good Coca Colas!

Saturday, May 9, 2015

Half wall


I built a half wall to hold books. I am going to add a top to it later when I find the right piece of wood.

At one time there was a wall there that we demo'd. So underneath it the flooring is chopped up. It serves as storage and covers the spot where the original wall used to be.


Here is my hand sketch for the half wall.

It probably took thirty seconds to sketch this out and it would take that long just to open Sketchup.

So most of the time it just simply a lot quicker to sketch on an envelope than it is to bother using Sketchup.


There will be a top added later.

Tuesday, May 5, 2015

Shoji Door

 I had this shoji door built for me by Cherry Tree Design.

It is for the pantry. It's built from walnut.

Cost $800.

This door was suppose to arrive about a week ago. I had been tracking it and I knew that it was already in town. I called them and they said it was going to arrive at lunch. Never came. Next day, nothing. I called them back. It was coming on a smaller truck. Never showed up. Called them back, it was coming tomorrow. Never came. Called them back. It would be here Monday.


By this time I knew there was a problem and I figured they had damaged it. They did. Cherry Tree didn't start building doors yesterday. Apparently they've had damaged shipments in the past. So they put a sticker on the crate that turns red if the shipment gets jarred.

When the truck showed up I could see the crate but I didn't see the sticker so I knew it was on the opposite side, they were trying to hide it. I walked around on the other side and saw that it was indeed red. I told the driver I had to note it on the ticket. He promptly wrote in "Shock monitor red - no apparent damage". This was suspect.

Backside of OSB crate lid
I looked over the crate which was well made out of OSB. There was a gouge in the top of the box just below the warning sticker. If you look closely you can make it out.
On the left you can see the inside part of the lid where it protruded through about an inch. It didn't puncture the door but I think the paper got stretched because it isn't tight like it should be.

Hole in OSB crate
I realize that loads shift in transit and that it was purely accidental. But they went out of their way to conceal it from me and the vendor, that's the part I can't stand. I lost a lot of time waiting on them to deliver it.

I'll never use Conway to ship anything

Sunday, March 29, 2015

Backsplash

We installed a marble tile mosaic in the kitchen for the backsplash. It was a total of about 27 square feet.
 Each box of tile contained 10 square feet of tile so we boght three boxes. It was $12/box. We laid the tile on the first day and then grouted it on the second day. We added the grout optimizer to the grout too. It is suppose to keep any stains from ever happening on the grout. We used unsanded grout.
We used a diamond cutting wheel on an angle grinder to cut the pieces so a tile saw wasn't necessary. Before grouting we applied sealer to the marble.


It's good to use a razor scraper and a light to make sure all the mastic is off the tile. There is a lot you won't be able to see until you get very close with a light you can hold in your hand.


Before
The simplest thing to do to span the gap between the cabinets where the stove goes is to screw a piece of scrap wood to the wall to rest the tile on. We just used a piece of scrap plywood.

Cost, around $500.


Now that's white!


A while ago the backsplash was white plastic glued to the wall. Perfectly functional but not a whole lot of character.


Monday, March 2, 2015

New Kitchen Cabinets


Top new, bottom old 
I've been busy lately building new cabinets to replace two in the kitchen. The two wall cabinets in the corner are the wrong size.

When I built them I didn't factor in the thickness of the doors. I could slide them over but then the window would not be centered and on the other side of the wall the vent hood wouldn't be centered.

It's not a bad thing though because I put one in my office and the other one is in the laundry room.

I still have the refrigerator cabinet enclosure to build as well. We haven't decided on a door style yet either. Slab door seem the most fitting but they're also the most expensive. It hasn't been bad not having cabinet doors however and I've noticed that lots of people are forgoing them altogether these days. But the base cabinets definitely need doors.


Sunday, February 22, 2015

Sketchup

3D Birdhouse modeled in Sketchup
I've seen so much lately about Sketchup that I decided that I should look into it.

I have been using AutoCAD since version 10 in the early nineties. Needless to say, I'm somewhat entrenched in ACAD's operation.

I think that is a hinderance to someone just starting out in Sketchup.

I first learned how to draft on a board with paper and pencil. AutoCAD is, or was, basically just a virtual piece of paper. All 2D. So you still had to be proficient at visualizing sections and elevations.

ACAD always tried to incorporate some 3D functions into the program but I always found them cumbersome and nobody used it for that. There were third party programs that were much better.

Sketchup sort of bypasses the drafting aspect and is a full on modeling environment. Trying to do a simple blueprint in Sketchup is not really worth the effort. It isn't set up for that. It's a model, not a drawing. That hung me up, a lot. I'm used to drawing everything with lines, not building it with shapes. The interface takes a lot from AutoCAD, there are lots of similarities.

I've spent a few days becoming acquainted with Sketchup and I've watched a lot of tutorials on Youtube as well. The birdhouse rendering is the result of the last two days. I could have built fifty real birdhouses in the time it's taken me to model it. But I'm starting to get the hang of it.

I probably sketch some idea out on paper at least once a day just to hash it out a bit. If it turns into something that I want to build I usually take the hand drawing and lay it out to scale in AutoCAD. Then I can usually find anything I might not have considered when I sketched it. I can usually get a shop drawing knocked out in an hour or less with CAD, depending on the complexity. I have the entire house drawn and I refer back to it constantly, especially the kitchen, where I actually have all the cabinet elevations drawn.

If I tried to model the kitchen in Sketchup it would take me forever and it would be hard to get it completely accurate. It just wouldn't be worth the time and effort. I'm sure someone could do it in no time. Most of the time however, I just don't have a need for a model. But I have several projects that I've been thinking of for a while that might be good candidates.

And Sketchup has a lot of cool features that might be of benefit to me in the future. It has a feature that enables you to bring in a site from Google maps that could be very helpful. Plus, I have seen a lot of awesome looking work that people have done with it who aren't engineers or architects, just folks who like to design. That's what the price tag of Sketchup enables. Cost, free!


Tuesday, January 20, 2015

Free cabinets!

So while driving to the store on Sunday I noticed a heap of cabinets on the side of the road that looked promising. I went back later on and they were in good shape so I loaded them up.

It looked like maybe a bathroom vanity that had never even been used. They weren't box store either, they were custom built, but not too expensive. The face frames are maple.

I have been reworking the garage to get more use of the space as a workshop and I recently finished some wall cabinets. I was just on the verge of building a base cabinet when I found this one.
Today I leveled the cabinet and mounted it to the wall. I mounted a piece of 3/4" plywood on top. I'm banding the edge with some thin walnut I had left from another project.

The drawers were on the pile but they were all busted up and looked cheap so I didn't pick them up. Today I decided that I am going to just hang doors on the cabinet and put a shelf in the middle and forego the drawers.

There were also four unfinished cabinet doors in the same pile. They didn't match the other stuff so they were probably from another part of the house.

I was going to eventually build doors for the wall cabinets that I just built. The doors are 36" which is the same height as the wall cabinet so I can probably just build a face frame for the wall cabinet and make them work too.

So thanks to the person I don't know who tossed out perfectly good cabinets and saved me lots of time and money!

Saturday, December 6, 2014

Cooking With Gas!


Samsung Gas Range
The old electric stove died right in the middle of cooking supper last Saturday night!

I could have probably fixed it but I had already paid for the new gas range the previous Wednesday.

This past week has been nightly cookouts on the deck. Not too bad of a week for it since it's been very mild lately. Nonetheless, building a charcoal fire five nights in a row gets old fast.

Ironically, I believe the house originally had a gas stove.

The new Samsung stove was a little over $700.  I probably had $60 in pipe and fittings to extend the gas into the kitchen.

We love it!


Thursday, November 13, 2014

Kitchen Update

A couple of weeks ago the new undermount kitchen sink arrived.

It's a Rohl Fireclay single compartment sink. It and the mounting brackets were about $700. Fireclay is suppose to be nearly indestructible and resists chipping like enameled cast iron does.
I can attest to the fact that it is much lighter. I was able to set the sink in place alone.

Delivery was free from Allmodern.com.

The old sink was a top mounted sink that came with the house that we had been using for the last two years.

Since the cabinet top was cut out for the old sink, I had to butcher the cabinet to mount the new sink. It doesn't matter though since it will be covered by the countertops.

Counter top installation
Speaking of which, arrived today. A few weeks ago we went to a counter place and ordered some granite countertops, finally. I'm not going to mention the business because I'm not happy with their customer relations. Actually, I didn't even go to the place that I had meant to go to because I read the map wrong (but that's another issue).

Anyway, the installers finally showed up this afternoon as the weather was turning wretchedly cold and windy. In about an hour they had the tops installed and polished. I can't say that I'm over the moon with the install. I've seen some discolorations that I'm not happy about.

They use a very acrid epoxy to join the seams with and it gave me a headache and stunk up the house for a long while.

It is nice to have some counters finally and we are happy about that.

The granite plus installation was about $1200.

The new kitchen faucet is a Grohe Concetto, which is a German mfg. but the product is made in Canada.

The faucet was about $300.

It's very nice quality and has a retractable spray head in the nozzle.

We opted to go with the deepest sink we could find which is 10".

I use a lot of big pots and pans and a two compartment sink is a real hindrance when trying to wash them out.  Hopefully this large sink will meet our needs a little better than the old sink.

Next up...tiling the backsplash. Whoopee!


Monday, October 20, 2014

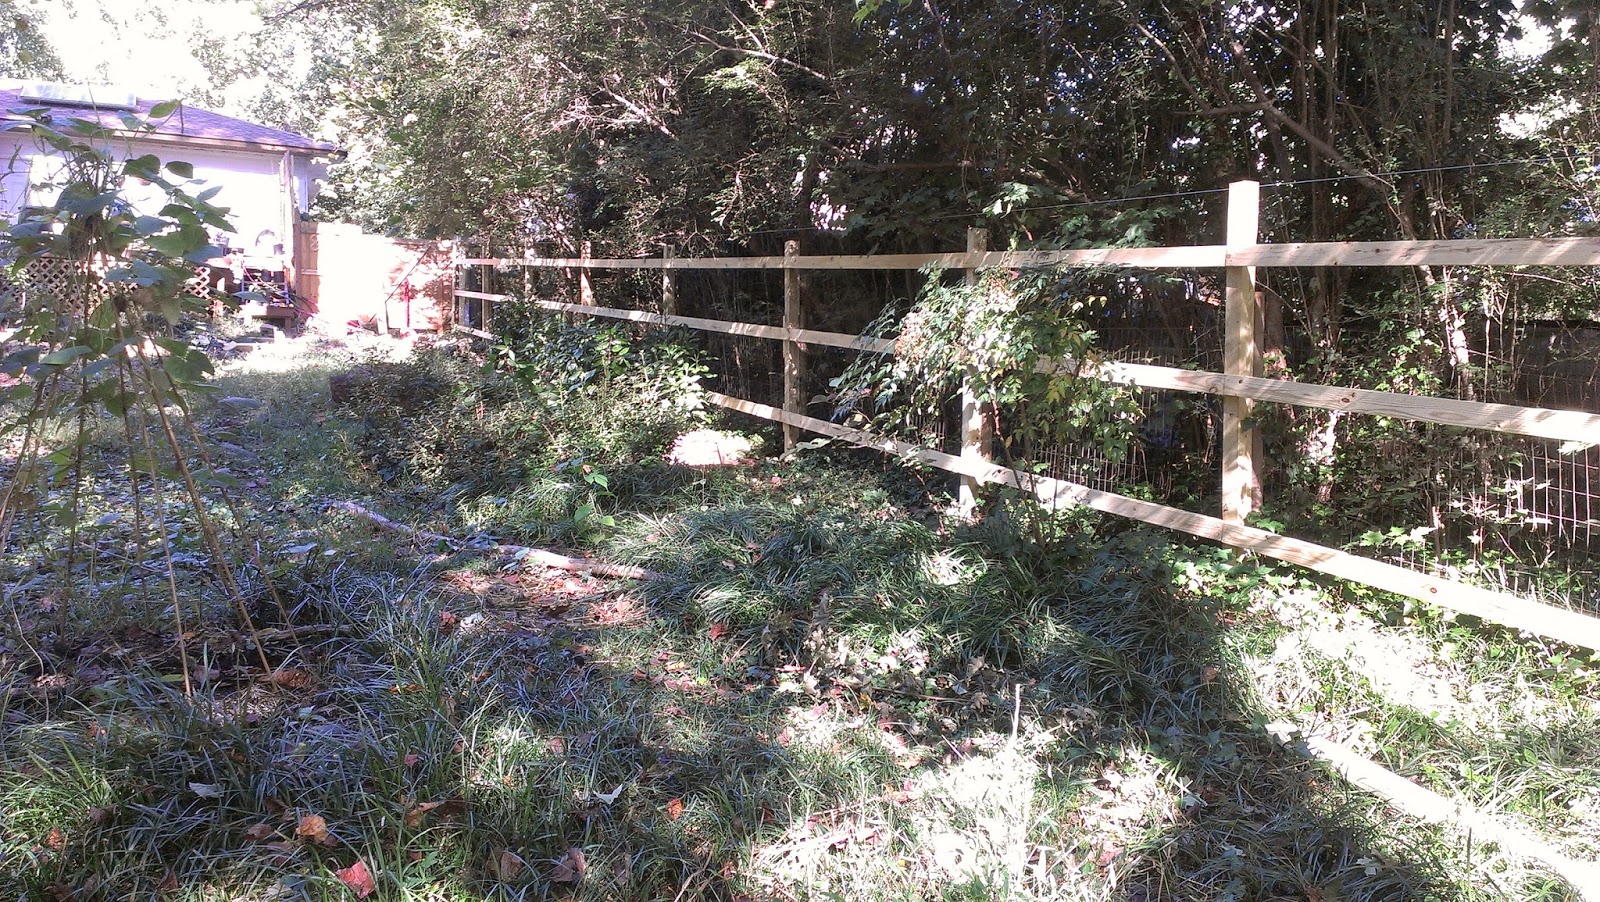
Fence Addition


I began working on the side fence last week. My neighbor suggested it after seeing the first one I built in the back. We're splitting the materials.

There was already a wire fence between the two yards that has been there for a while. I decided to bolt the new posts against the existing ones to avoid extra digging.

Cost of materials $800.


Wednesday, October 8, 2014

Hi Efficiency Washing Machine

Over the weekend the State of Georgia had a sales tax holiday on energy star appliances so we decided to take advantage of it.

The LG brand gets high marks for their machines so we decided to go with them. I bought this one at Home Depot nearby and they delivered it and took the old one for free.

This machine is virtually silent! It saves on water and electricity.

Georgia Power has a rebate program for washing machines for $25.

The washer was $699 less a 10% discount and no tax so out of the store it was $625.

With the $25 rebate it will be $600 even.

Wednesday, September 24, 2014

Bathroom


 Finally the light fixture arrived! Besides one or two other additional things that aren't fixtures we are basically finished with the bathroom renovation.

The final cost was around $3500, less labor of course.

A little bit of touchup work needs to be done but it's minor. We'll probably just leave it as is for a guest bath and not a master bath.

It's not perfect but I'm glad to be done with it. The tile is probably the weakest link. I learned a lot about it by doing it, so the next tile job will be better.


bye bye 1971!

Wednesday, August 27, 2014

Bamboo Ceiling

Underlayment on ceiling
The old ceiling in the bathroom was stippled with a "crow's foot" pattern which looked like crap.

Without tearing out the ceiling, which I did not want to do, the only obvious choice was to cover it up. It's only 40 square feet so it isn't that big of a job so we decided to use bamboo flooring.

The first step is to install an underlayment over the stippled ceiling first to level it out. This is just a thin foam pad that is stapled in place. Cheap and simple fix.
The bamboo flooring is tongue and groove so it goes together fairly easy. The bamboo is pretty forgiving and not hard to work.


It was kind of an afterthought because it would have been easier to install it first, but it worked out okay and it looks very cool!